Reply With Quote
hahahaha
jose if i do that i won't have any money for the tank ....lol..!
ur pics of the aquarium are just amazing their my desktop wallpaperz..!!!
awesome job man..!!
 |
 |


wow..amazing!!
whole setup is awesome..
very nice biotope and great looking wilds..
simply love your Idea!! its great
hahahaha
jose if i do that i won't have any money for the tank ....lol..!
ur pics of the aquarium are just amazing their my desktop wallpaperz..!!!
awesome job man..!!

thanks for the input on the granulated carbon filters. what is the thing on the right of those in the pic with the filters?
~Cammie

The wilds are Manacapura Gipsy blues and Japura Greens. They came from John/Snookn (vendor here). I also have two captive turqs.Originally Posted by Vee

Thank you!
Haha thanks! I got lucky since the tank was so cheap. Picked it up for $275. Otherwise, this would have been a very expensive project! The light was actually the most expensive part of the setup. Got about $450 into it.
That is a sediment filter followed by a pressure regulator. Not really needed for this setup, since the water is simply feeding straight into the barrel. This chloramine filter setup was used on my previous tank for a 24/7 drip system using drip emitters. Those need a lower psi and the water has to be free of debris or they'll clog, hence the sediment filter and pressure regulator. I just threw it on since I had it all rigged up already.
- Jose

Very nice fish as usual from Snookn21. No concerns with mixing the wilds with domestics?
Great tank setup. Great accomplishment of techniques and skill. This setup
is an inspiration to me. I know there is a simple answer, but can you tell
me a little about your overflow box. Why is it a small box design. I know
most of the installed ones are long from top to bottom. Does it have something
to do with noise, or is it a stronger syphon?
Jeff
Thanks! Not that I'm aware of. They've been together for several months now, and get along just fine. I didn't know they couldn't (or shouldn't) be mixed.
Hey Jeff,
Thanks for the feedback. The main reason for going with a short horizontal overflow is space and efficiency. Vertical overflows are a huge waste of space. There really is no need to have a long overflow box, unless you're dead set on having bulkheads at the bottom of the tank. Also, by having a short horizontal overflow box, you can make it longer and not lose much tank space like you would with a vertical box. By making it longer, you have more physical area for surface skimming, which makes for a more efficient overflow box. These horizontal overflows have become very popular on reef tanks. They commonly go by the name of "Calfo" overflow, or coast-to-coast overflow, named after the guy that came up with the design. Saltwater setups have a lot of proteins that need to be skimmed, so a big long overflow box is idea. This would be a huge waste of space with the vertical design, so the short horizontal box is much better. But for freshwater, we don't need a huge long box, that's why I made a smaller version.
This is what you see on a lot of reef tanks these days:

- Jose
I don't personally have any experience, as I jumped into discus directly with wilds. But it's here on Simply that I read many people saying that Wilds and Domestics carry different bacteria loads and types and may cause problems. I'm glad to see yours working out though, as I'd like to try it some time.

Amazing Set Up - Congrats!
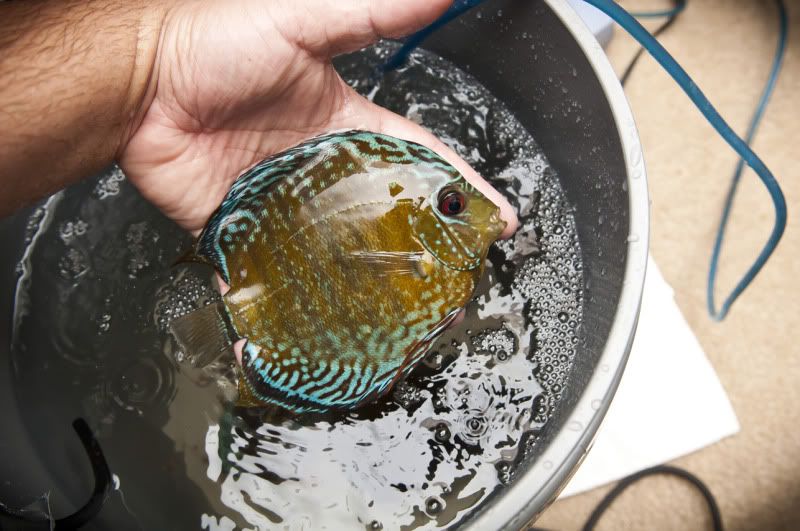
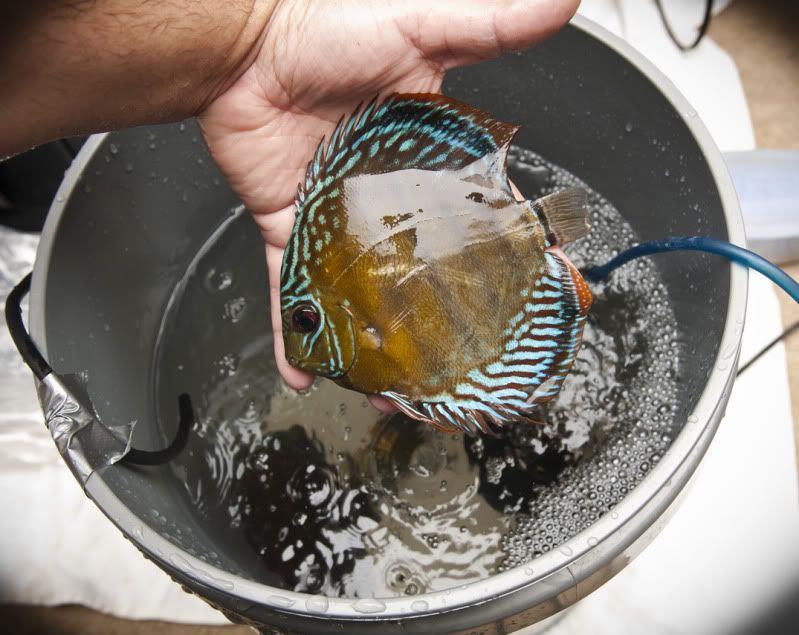
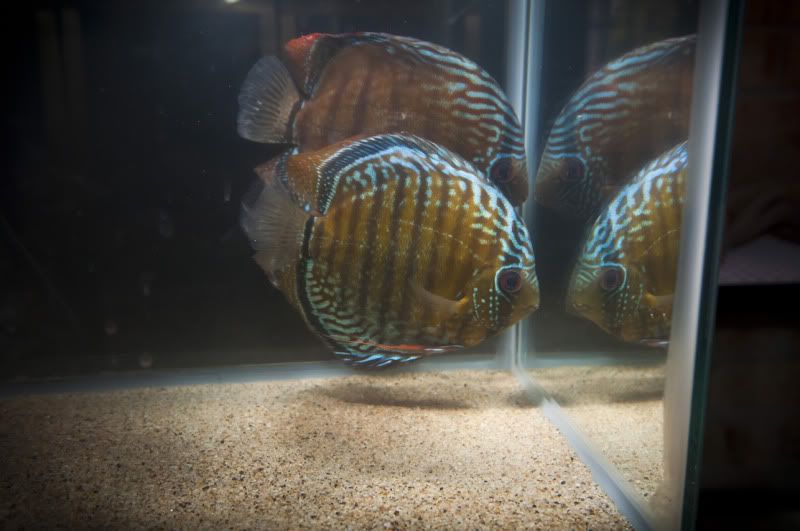
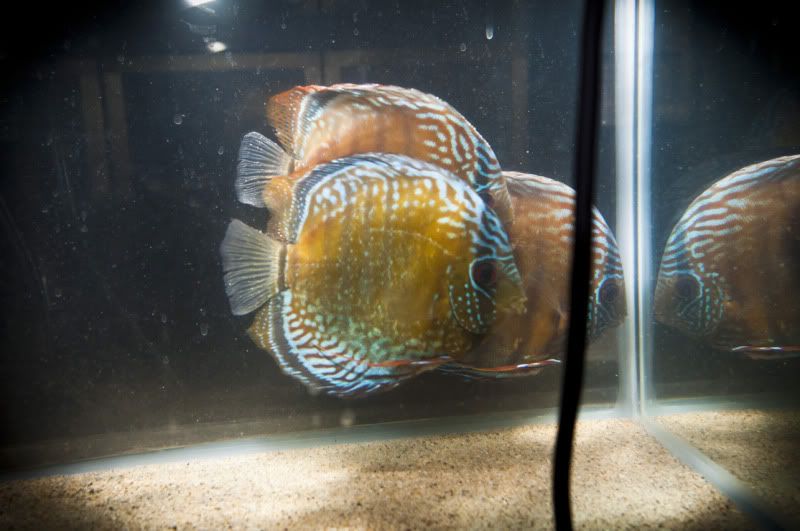
Very stoked! Just received my new group of wilds about an hour ago. I purchased three large Alenquer semi-royal Blues from John/Snookn. These guys are beautiful! John had them labeled as blues but he said lately they've been looking very red. Who knows, but they do look very nice. Here's some pics in their QT tank which will be home for the next 4-6 weeks. I'll be watching them closely to see if I need to give them a de-worming.
On to some terrible quality photos
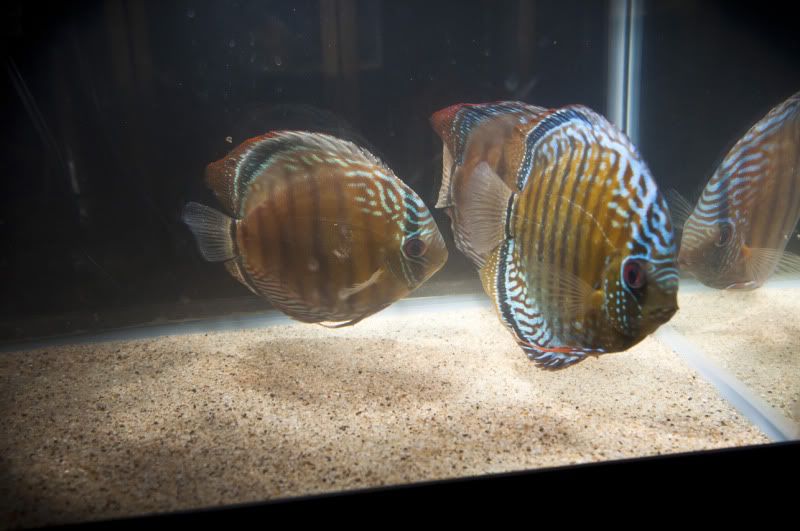
- Jose
They sure look great. Congrats. Can't wait to see them out of quarantine and into the tank.

nice setup!
Sean

Love that fish in the second bucket shot.
-Matt
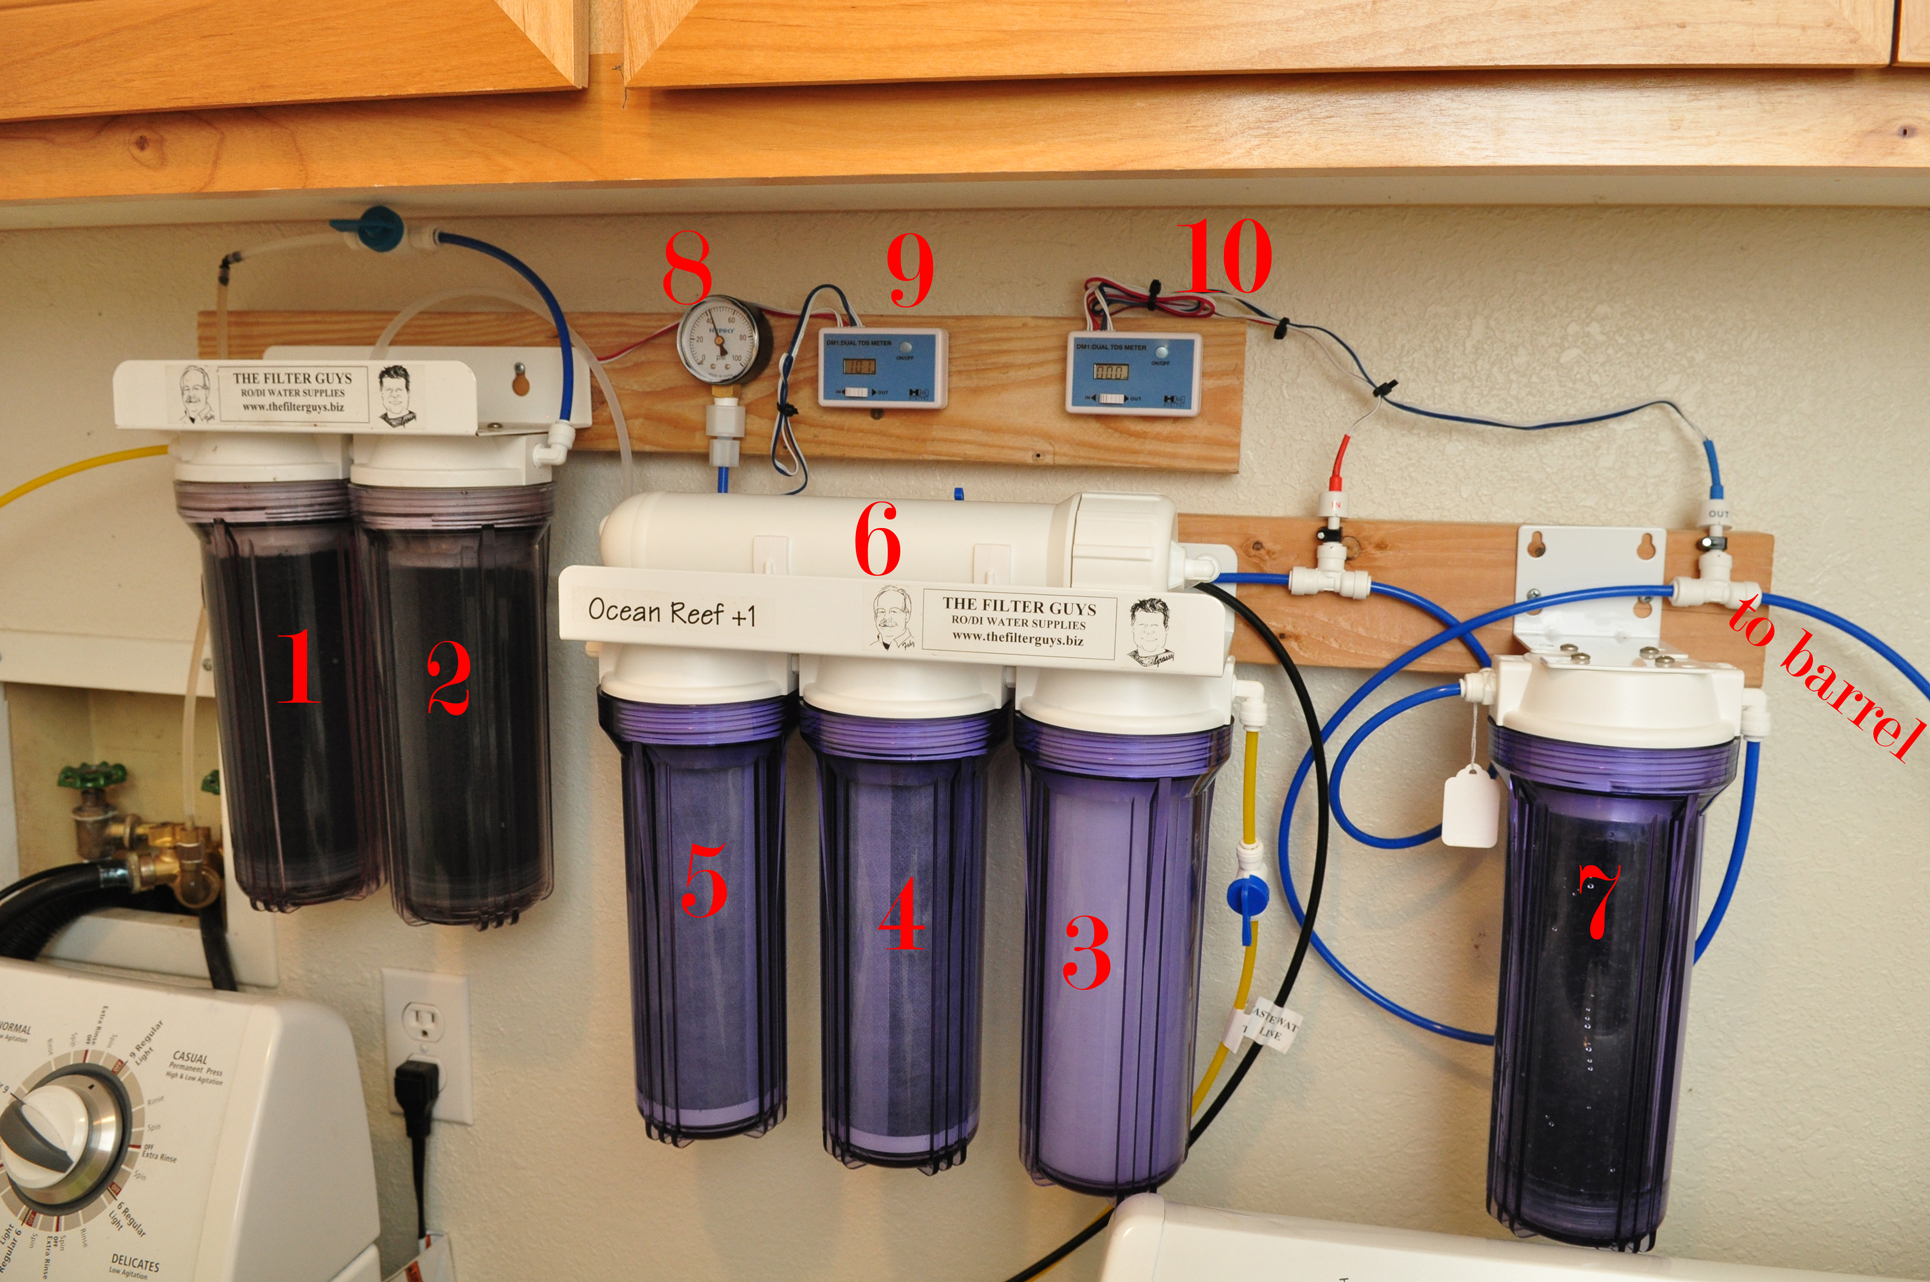
Got the RO/DI system hooked up. Thanks again to www.thefilterguys.biz. Second time I've ordered from them. Their products and service are top notch! I picked up the 5 stage Ocean Reef +1 unit, and hooked it up to the chloramine filter I bought from them some time ago. So I'm essentially running a 7 stage RO/DI unit
Hookup was a breeze. The unit started producing pure water in no time, with no leaks at all. Here's a quick rundown of all that is going on for those that are new to RO/DI units (this is my first one as well).
*in order of water flow*
1. GAC Chloramine cartridge (granular activated carbon)
2. GAC Chloramine cartridge (granular activated carbon)
3. 5 micron poly sediment filter
4. 5 Micron Matrikx NSF rated CTO/2 Workhorse carbon block
5. 0.6 Micron Matrikx NSF rated chlorine guzzler carbon block
6. Dow Filmtec 75gpd RO membrane
7. DI cartridge w/ refillable resin
*misc*
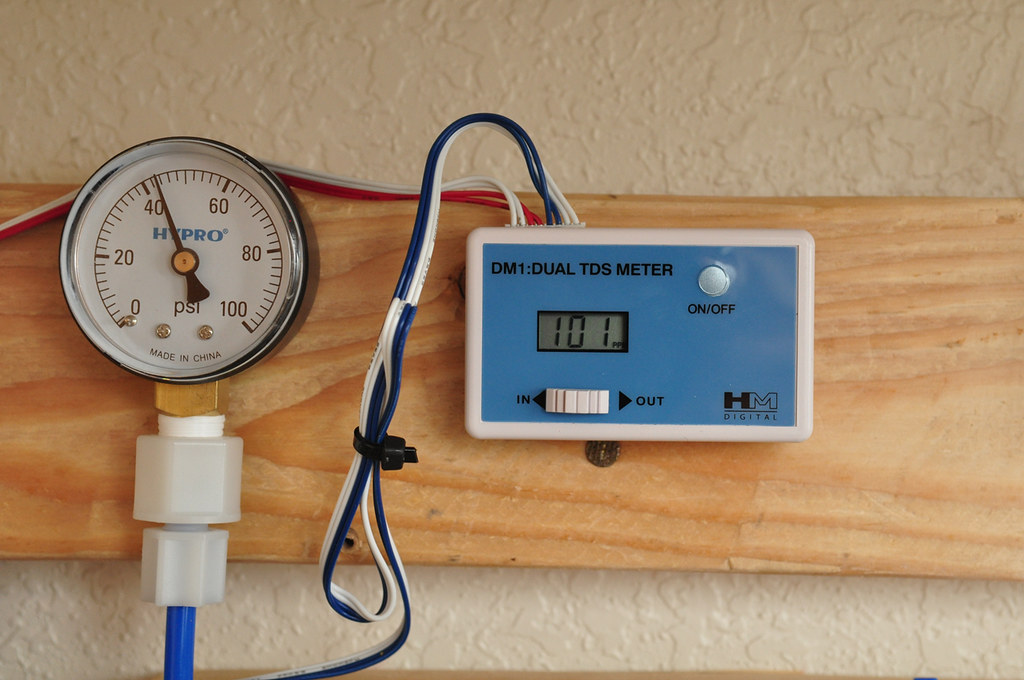
8. Pressure gauge for water going into RO membrane
9. Inline dual TDS meter (measures straight tapwater and water before RO membrane)
10. Inline dual TDS meter (measures water after RO membrane, and after DI filter)
Waste water is going into my laundry drain. Maybe in the near future I can figure out a better use for it so I'm not wasting so much water.
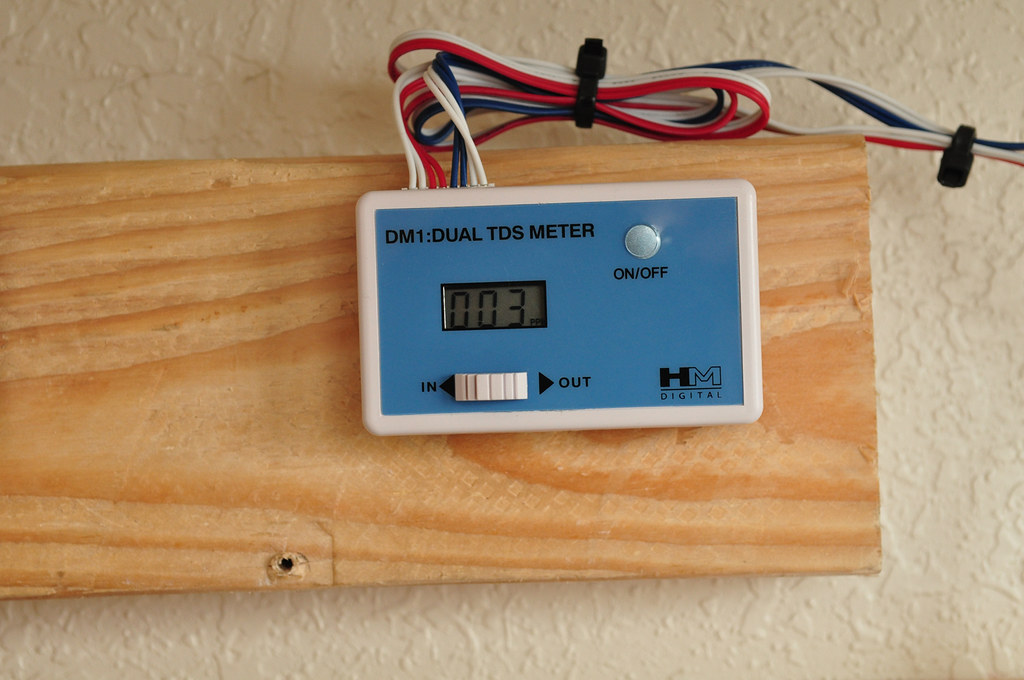
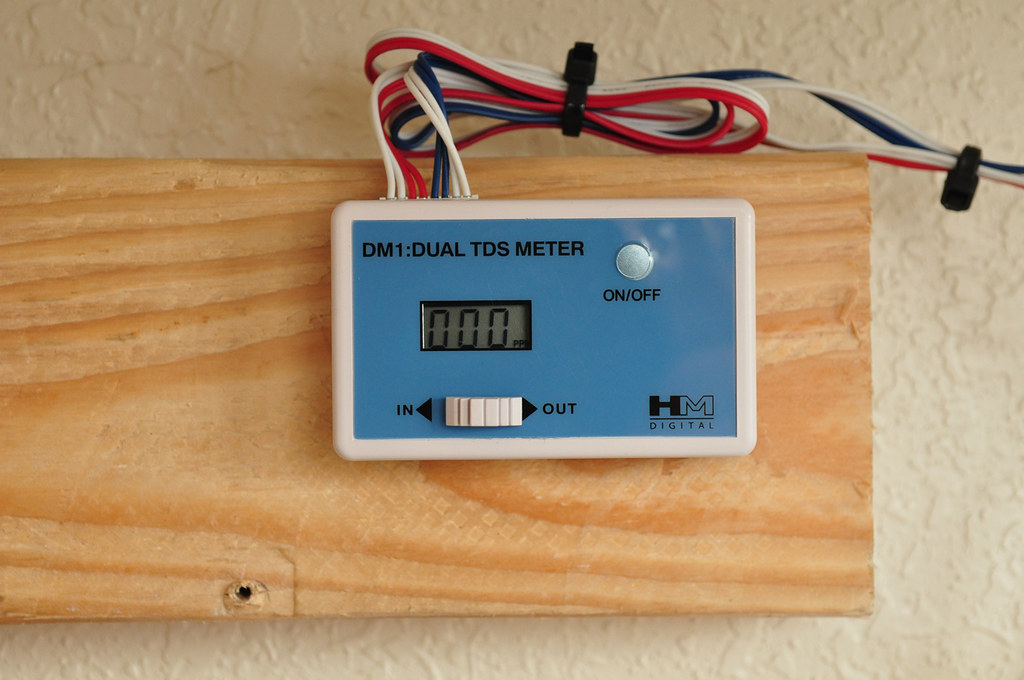
And here's some photos of the TDS meters in action:
Tapwater straight from the faucet
After passing through the RO membrane
And after the last stage, the DI filter. Purest water you can get. 0ppm TDS!!!
To re-mineralize the RO/DI water with essential minerals I'll be using Kent's R/O Right and Discus Essentials. I'll add this after each water change, for the amount of water changed.
- Jose
Wow...very impressive water setup. I'll have to look into the filterguys when I set up a new tank in the basement.
 Posting Permissions
 |